How to Effectively Remove Plaque with a Water Flosser
- 1. How Water Flossers Work
- 2. The Advantages of Using a Water Flosser
- 3. Step-by-Step Guide to Removing Plaque with a Water Flosser
- 4. Real-Life Experiences and Success Stories
- 5. Where to Buy a Water Flosser for Plaque Removal
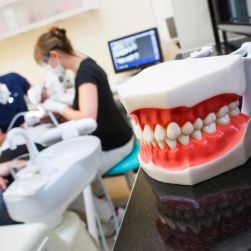
1. How Water Flossers Work
Water flossers, also known as oral irrigators, use a stream of pulsating water to clean between teeth and along the gumline. These devices work by dislodging food particles and plaque that can accumulate in hard-to-reach areas of the mouth. Unlike traditional flossing, which involves manually inserting string between teeth, water flossing relies on a high-pressure water stream to gently clean the gums and teeth.
This makes water flossing a suitable option for those who struggle with manual flossing, individuals with braces, and anyone seeking a more comfortable, effective cleaning experience.
2. The Advantages of Using a Water Flosser
Water flossers offer several benefits that make them an excellent tool for plaque removal:
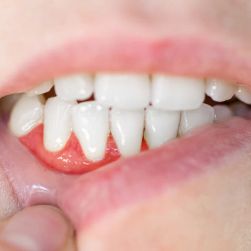
- Improved Plaque Removal: Clinical studies show that water flossers can remove plaque more effectively than traditional flossing, particularly in hard-to-reach areas.
- Gentle on Gums: The water stream is gentle, making it ideal for people with sensitive gums or those who experience discomfort from traditional flossing.
- Faster and Easier: Using a water flosser takes less time than regular flossing, which can help users stick to a consistent oral hygiene routine.
3. Step-by-Step Guide to Removing Plaque with a Water Flosser
To effectively remove plaque with a water flosser, follow these steps:
- Step 1: Choose the Right Water Flosser: Select a water flosser that suits your needs. Some models have adjustable pressure settings, and others come with different tips for various oral care needs.
- Step 2: Fill the Reservoir with Water: Add lukewarm water to the flosser’s reservoir. You may also consider adding a bit of mouthwash for added freshness.
- Step 3: Set the Pressure: Start with a low pressure setting if you are new to water flossing. Gradually increase the pressure as you become more accustomed.
- Step 4: Begin Flossing: Lean over the sink and guide the water stream along your gumline and between your teeth. Move methodically to ensure each tooth receives proper cleaning.
- Step 5: Rinse and Finish: After flossing, rinse your mouth with water or mouthwash to remove any remaining debris.
4. Real-Life Experiences and Success Stories
Many users have shared their positive experiences with water flossers, citing significant improvements in their oral health. For instance, Jessica, a 35-year-old mother of two, struggled with traditional flossing due to time constraints. After incorporating a water flosser into her routine, she noticed a reduction in gum bleeding and better plaque control after just two weeks.
Success stories like Jessica’s are not uncommon. People report feeling more confident about their oral hygiene, with cleaner, fresher mouths and fewer dental visits required for plaque buildup and gum issues.
5. Where to Buy a Water Flosser for Plaque Removal
If you are ready to take the plunge and start using a water flosser to remove plaque, it's crucial to choose the right product for your needs. Visit Dentistry Toothtruth for expert recommendations and product reviews. Our comprehensive buying guide will help you make an informed decision on the best water flosser for plaque removal based on your preferences and budget.
Take control of your oral health and enjoy the benefits of a plaque-free smile. Click here to discover the best water flossers and start your journey toward better oral hygiene today.